Getting the most out of Monoprice Cadet 3D Printer
I entered the world of 3D Printing recently with the small but surprisingly capable and affordable Monoprice Cadet 3D Printer. It has won recognition as the best budget 3D printer of 2020. In this post, I share tricks I learned over the past few weeks to make the most out of this printer.
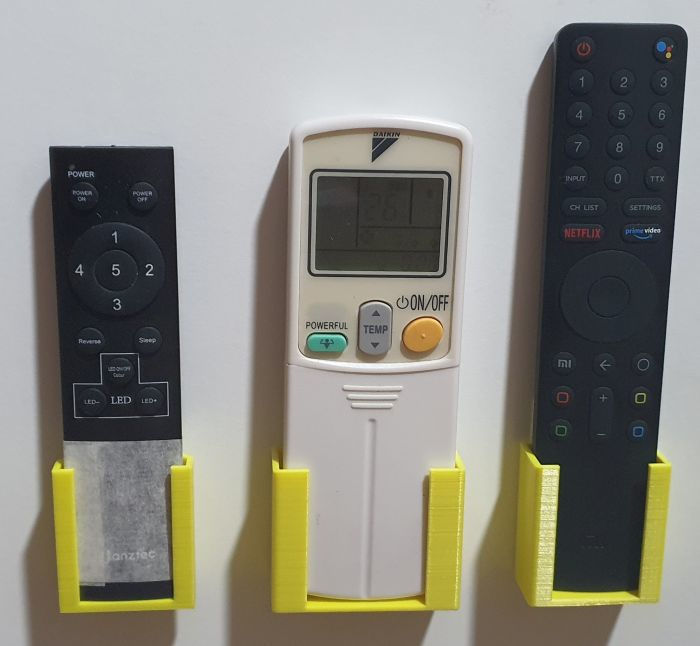
Though the printer is fairly small with a print bed of only 10 cubic centimeters, I was able to design and print quite a few useful things around the house using TinkerCAD
Organizing Remote Controls
Sheet Music Holder

Monoprice Cadet has child-friendly features that make it a good choice for home use like auto-bed leveling, a removable magnetic bed to make it easy to remove printed parts and a finger guard to reduce the risk of curious little fingers touching the hot nozzle. It also has (slightly buggy) WiFi and USB connecitivty. While there are a number of un-boxing blogs and videos, in this post, I will focus on sharing a few less obvious tips.
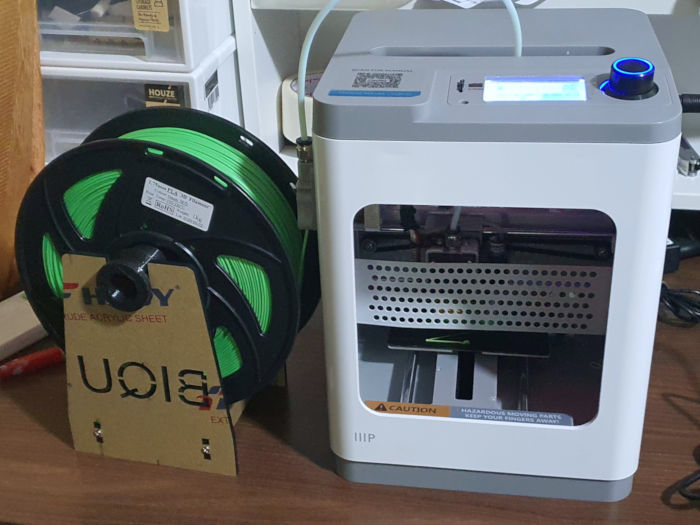
Buy a filament spool holder
The filament holder attached to the printer is woefully inadequete and small - probably to save package size & shipping cost. The amount of filament that comes out of the box with the printer is also barely adequete. Buy a filament spool holder like the one in the pic at the top to get a much better experience - it costs only 10-20 dollars (2020 prices).
Filament doesn’t feed into the tube
I got a scare the first time I tried to print as the filament simply did not feed into the printer & got stuck in the filament feeder. I found out that the tolerences in my printer’s feeder were such that the filament would get stuck inside the feeder’s components and not even enter the tube when I insert filament. A periodic clicking noise from the feeder is a sure sign the feeder is jammed in some way. Here’s how you can fix this issue.
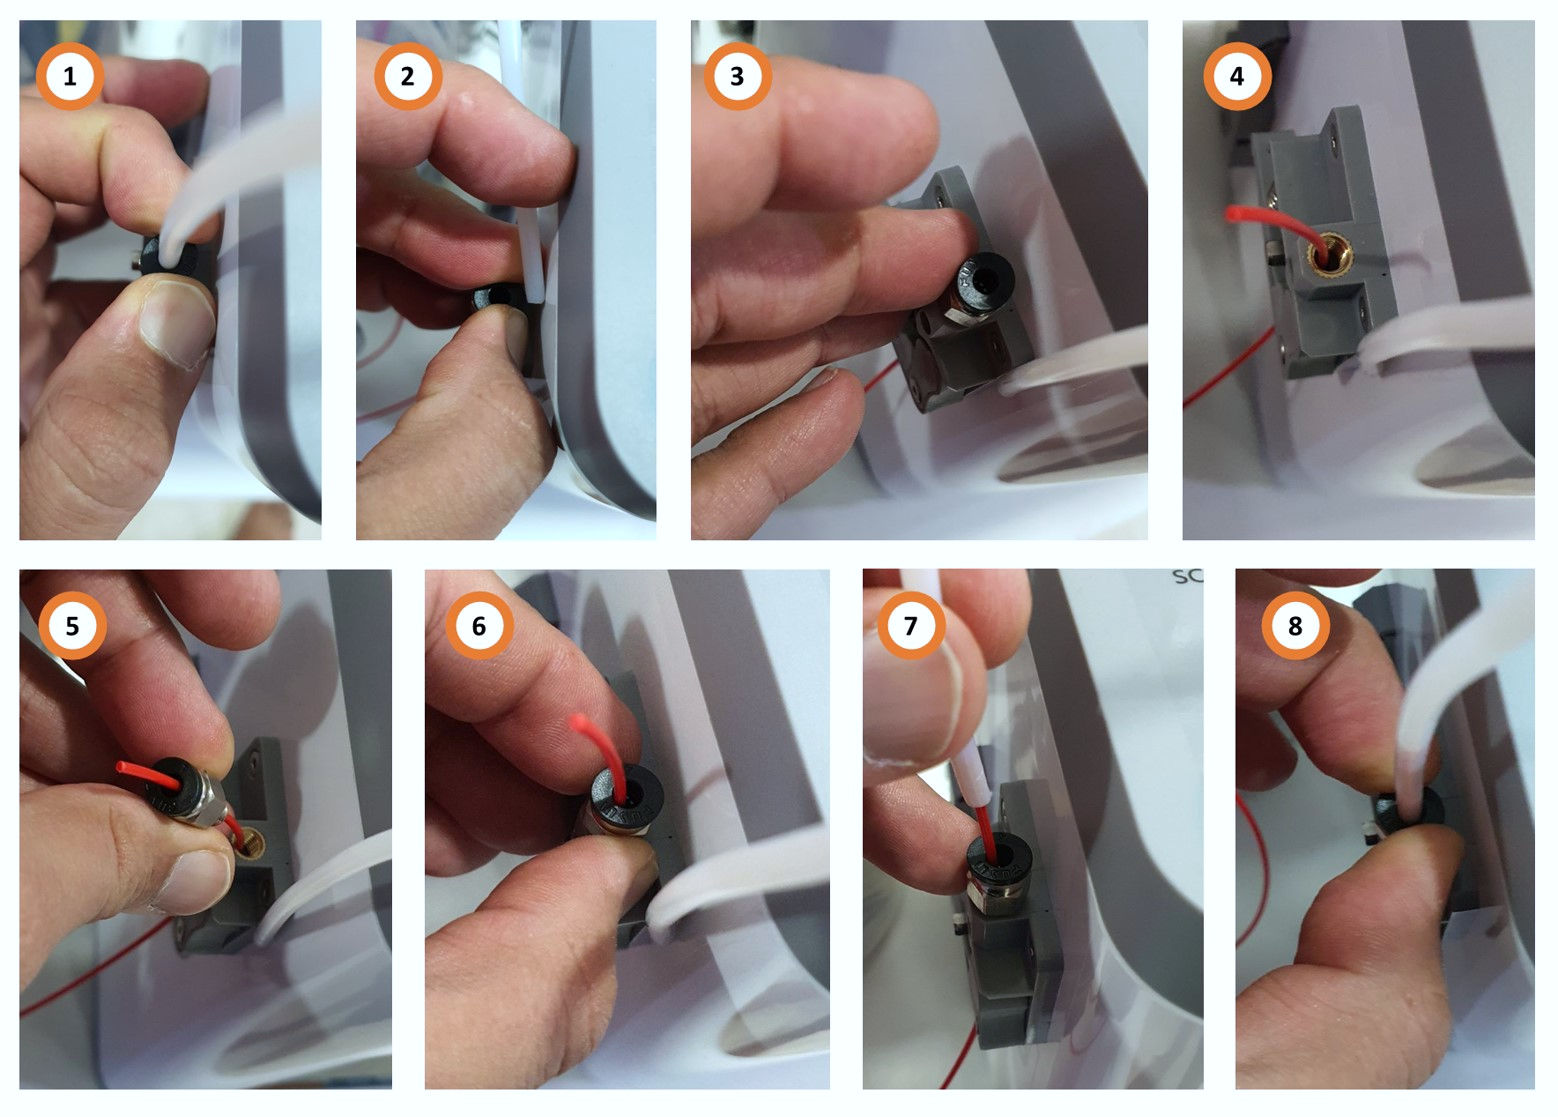
- Press the black latch above the filament feeder to release it
- Remove the white filament tube while keeping the latch pressed
- Unscrew the stainless-steel feeder nut (you might need a spanner)
- Pressing the filament latch at the bottom, push filament through
- Re-insert the feeder nut threading filament through
- Re-screw the feeder nut to the feeder
- Re-insert the tube threading the filament into it
- Press the black latch & insert the tube back into the nut
WiFi connection issues
The recommended way to connect the printer to a WiFi network is to use the PoloPrint app from your smartphone. However, I had a number of issues getting this to work.
I eventually found out by researching the WiFi networks in the house and port scanning that if the Cadet printer is unable to connect to WiFi, it stands up an open WiFi network of its own with something like ESP32 or Espressif in its name . This refers to the famous ESP32 MCU that seems to be the brains of the printer. Here’s how I was able to set the WiFi credentials using this. Unfortunately, I didn’t take screenshots.
- Connect to the WiFi network put out by the printer
- Find out the printer’s IP address. On Linux you can do
arp. On windows, you probably need to run a port scanner like nmap to discover whats on your net - Connect to port 88 from your browser. Eg. if your printer is 192.168.0.1, then type
http://192.168.0.1:88in your browser - You will see a small web-app that will show you detected WiFi networks & allow you to connect to your preferred network setting credentials.
Upgrading to latest OEM Firmware & Software
WARNING: THIS MAY VOID YOUR WARRANTY AND MAY BRICK YOUR PRINTER. TRY THIS AT YOUR OWN RISK ONLY IF YOU UNDERSTAND WHAT YOU ARE DOING AND ARE WILLING TO RISK THE CONSEQUENCES. I DISCLAIM RESPONSIBILITY FOR ANY ISSUES AND I WILL NOT HELP DEBUG.
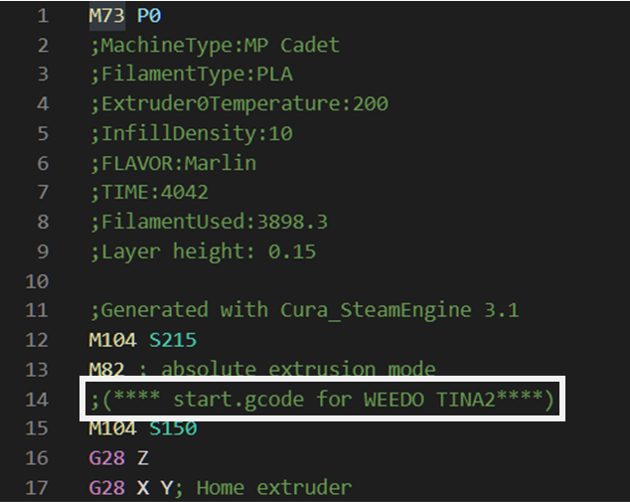
If you look at the generated GCode file produced by WiiBuilder software provided by Monoprice, you’ll find that the Monoprice Cadet printer seems to be essentially a re-branded version of a 3D printer called TINA 2 by a Chinese 3D printer manufacturer called WEEDO.
It turns out that the manufacturer has released newer versions of firmware, drivers and software on its website that are less buggy & have more functionality built-in than the versions offered by Monoprice.
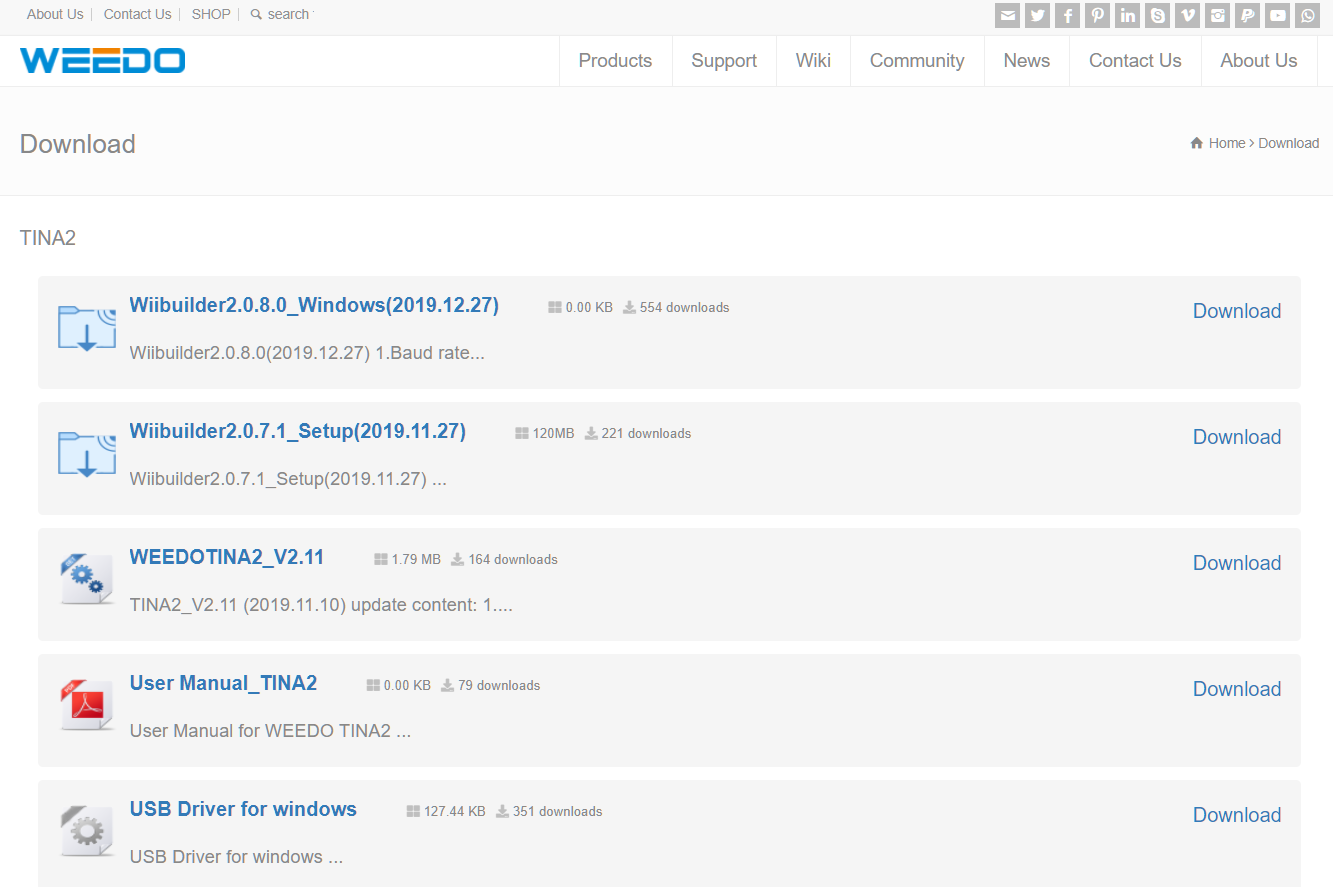
Weedo also has a very comprehensive wiki with has detailed instructions including for maintainance and firmware update.
I followed the method 2 documented in the
firmware update
page to upgrade my printer’s firmware version to 2.11. Everything went well and the new firmware
seems to have much more stable WiFi support and additional support for OctoPrint. The
logos changed from Monoprice to Weedo OEM branding.

I also found that the latest version of WiiBuilder software (2.0.8.0) from the OEM far
less buggy than the one provided by Monoprice when loading GCode files & uploading to the
printer through WiFi. Since upgrading firmware & software, I have had no issues printing
using a WiFi connection.
Using the latest version of Cura
WARNING: THIS IS UNSUPPORTED AND MAY DAMAGE YOUR PRINTER NOZZLE IF IT DOESN’T WORK PROPERLY. TRY THIS AT YOUR OWN RISK ONLY IF YOU UNDERSTAND WHAT YOU ARE DOING AND ARE WILLING TO RISK THE CONSEQUENCES. I DISCLAIM RESPONSIBILITY FOR ANY ISSUES AND I WILL NOT HELP DEBUG.
Cura is a much more powerful, flexile and widely used open source slicing software than WiiBuilder and supports multiple operating systems. It has a multitude of options to customize and fine tune your prints. For instance I routinely print with thicker walls and more in-fill than default as I find it better to spend a little extra time and material than have a toy I’ve printed for my daughter break.
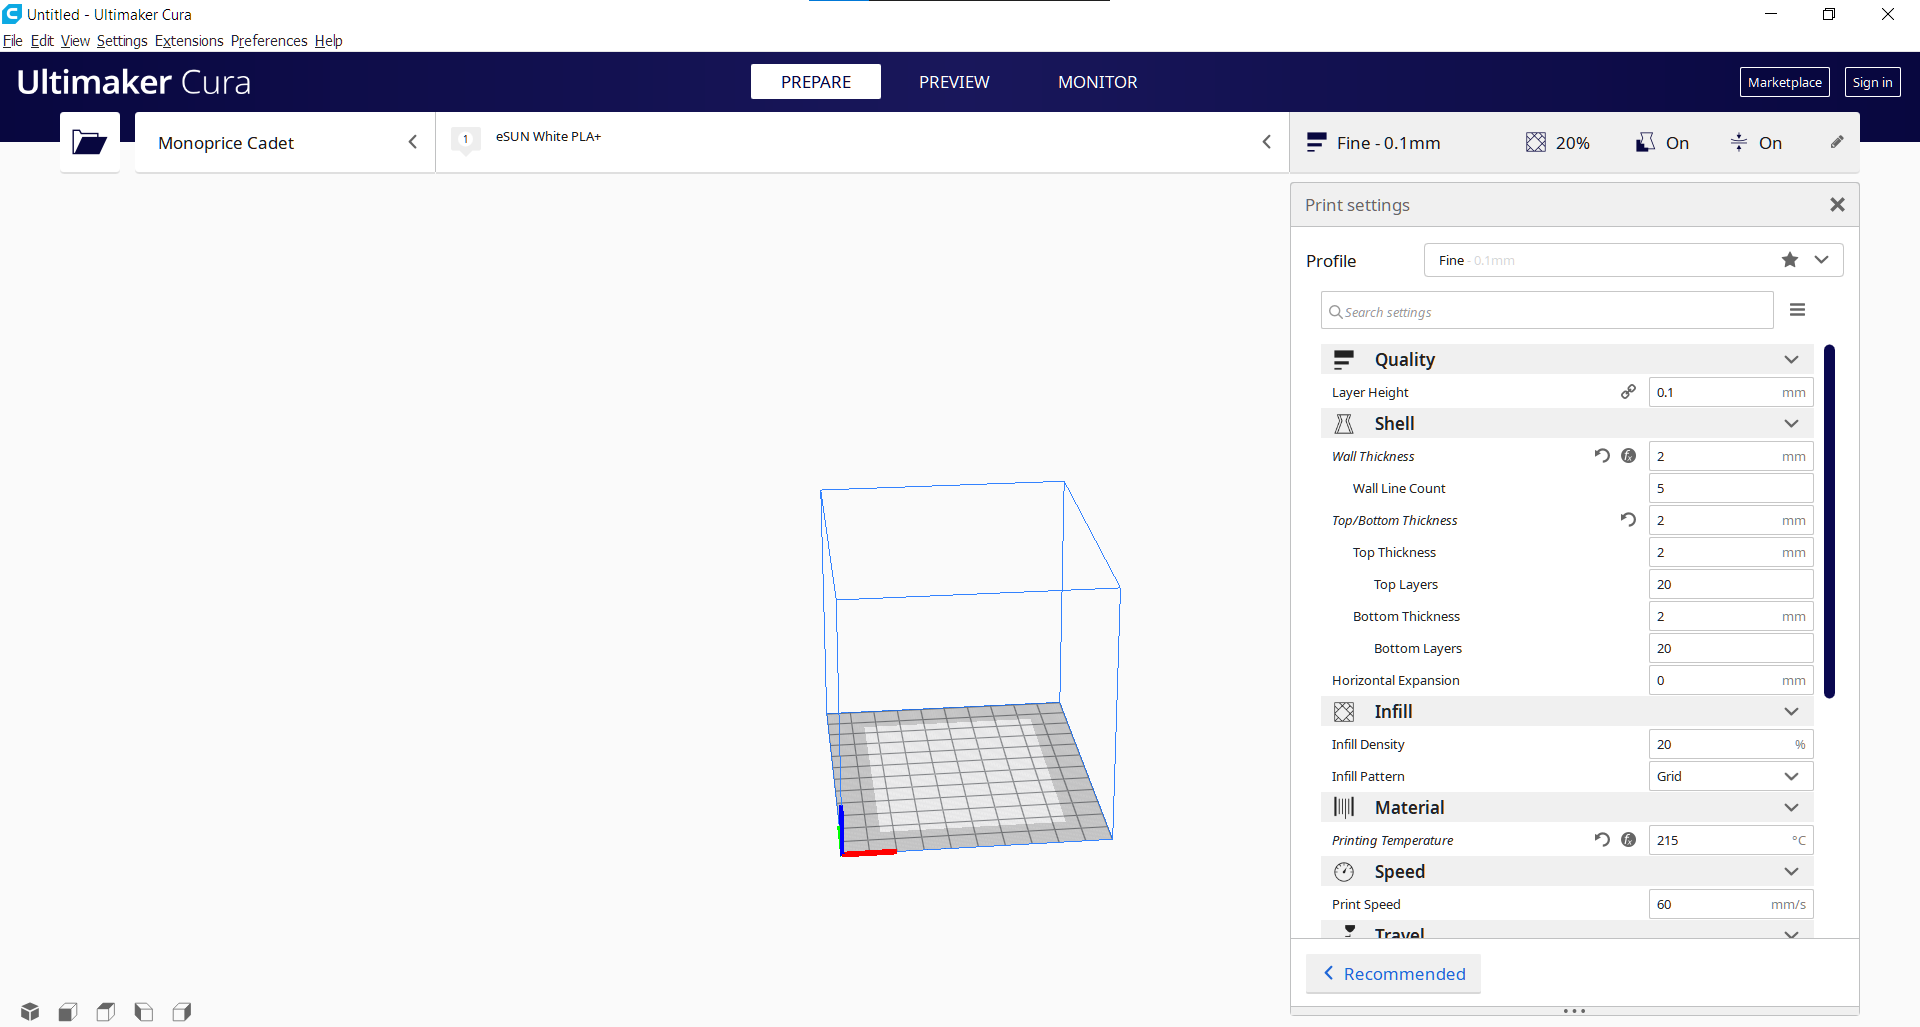
Both Monoprice and WEEDO provide versions of Cura that supports Monoprice Cadet but the supported Cura version is quite old. Incidentally, if you look through the GCode file listing above, you’ll note that even WiiBuilder seems to use the Cura engine underneath to generate the GCode.
To use the latest version of Cura, you’ll have to setup the printer manually in the software. After
looking through the generated GCode files from both the officially provided WiiBuilder and Cura
software and understanding the generated the Marlin GCODE, I
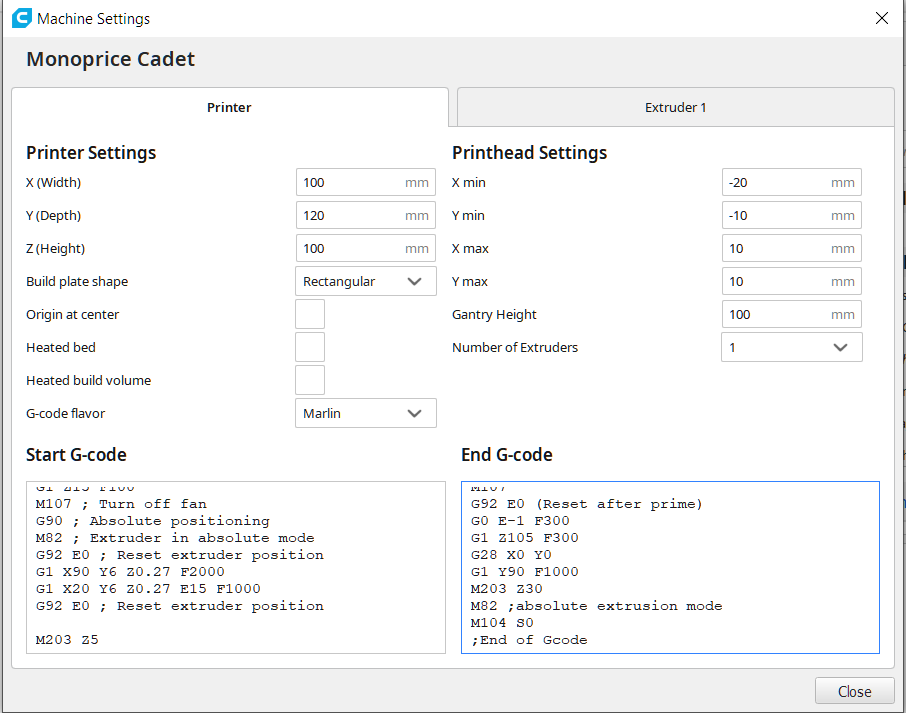
came up with the following configuration that seems to work with the latest version of Cura (4.7).
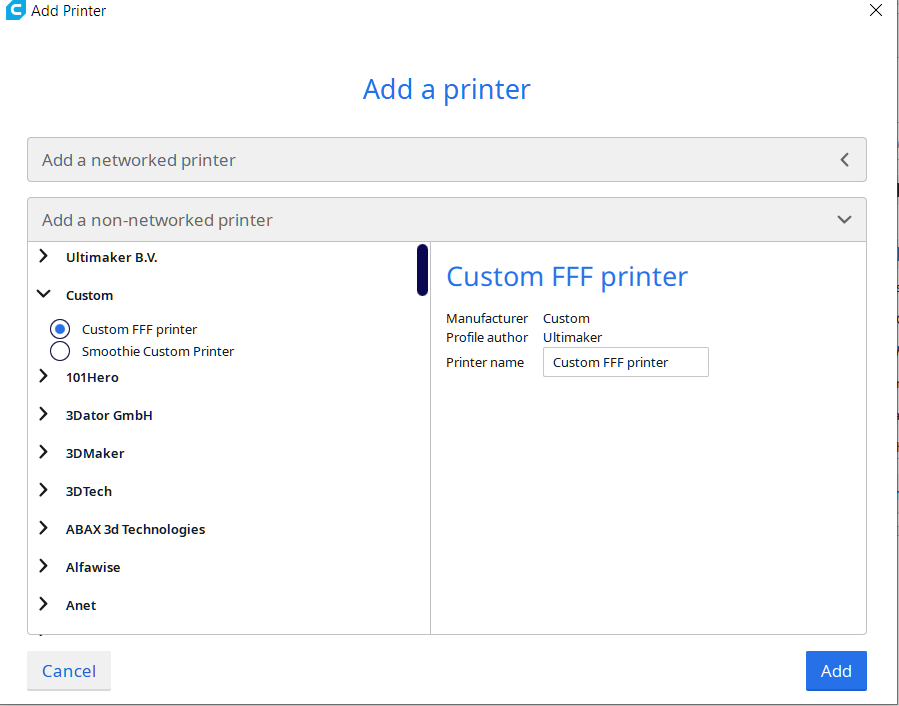
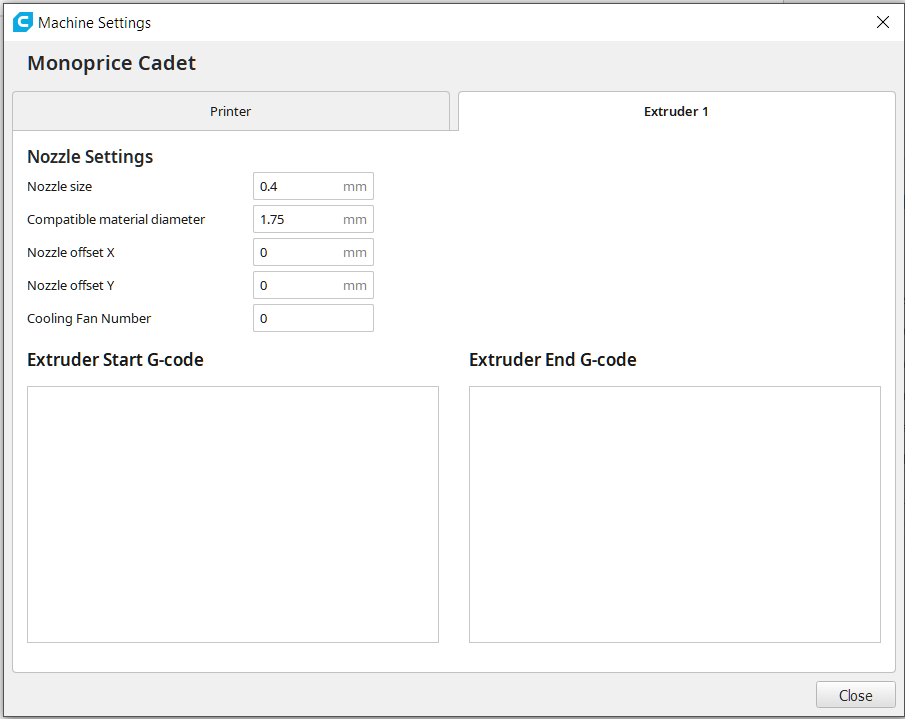
Here’s how you go about adding Cadet as a custom printer. Type in the settings from the screenshots
below into the machine settings dialog screens in Cura making sure you fill in both the Printer and
Extruder settings correctly. I have provided listings for the Start GCode and End GCode that I am
using below.
Add Printer screen
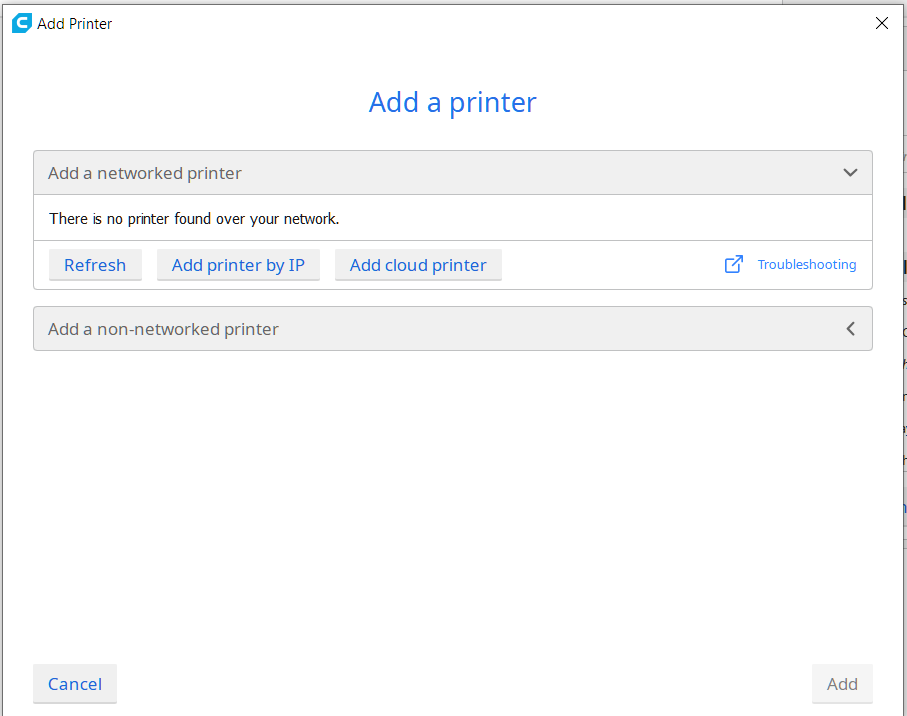
Add a Custom Printer
Printer Settings
Extruder Settings
Start GCode listing
;(**** start.gcode for Cadet****)
G28 Z
G28 X Y; Home extruder
G1 X55 Y55 F1000
G1 Z10 F200
G29
G1 Z15 F100
M107 ; Turn off fan
G90 ; Absolute positioning
M82 ; Extruder in absolute mode
G92 E0 ; Reset extruder position
G1 X90 Y6 Z0.27 F2000
G1 X20 Y6 Z0.27 E15 F1000
G92 E0 ; Reset extruder position

M203 Z5
End Gcode listing
;(**** end.gcode for Cadet****)
M104 S0
M107
G92 E0 ;(Reset after prime)
G0 E-1 F300
G1 Z105 F300
G28 X0 Y0
G1 Y90 F1000
M203 Z30
M82 ;absolute extrusion mode
M104 S0
;End of Gcode
Happy 3D printing!